
First launch and setup
After installing a package, BarkVisor runs in the background and serves the web console on port 7777.
Open http://localhost:7777 in a browser on that Device. Use localhost, not 127.0.0.1, because BarkVisor rejects raw IP addresses for passkeys.
If you want to add this Device to an existing Home, follow Home and pairing before creating a new Home.
See the glossary for Home, Device, and Workload definitions.
Set up a remote Device
Section titled “Set up a remote Device”Passkeys need a secure browser connection: localhost or an HTTPS hostname. Opening a remote Device’s IP address over HTTP will not work for passkey setup.
If you already use Tailscale, enable HTTPS access on the Device:
tailscale serve --bg 7777Open the HTTPS address printed by the command. Tailscale must be installed and connected first; follow its Serve instructions.
Another option, for a Device with SSH access, is a tunnel from your computer:
ssh -L 7777:localhost:7777 <user>@<device-address>Keep the tunnel open and browse to http://localhost:7777. This requires port 7777 to be free on your computer.
Use the same hostname for later sign-ins. A passkey registered on localhost will not sign you in through a different hostname.
1. Name the Device
Section titled “1. Name the Device”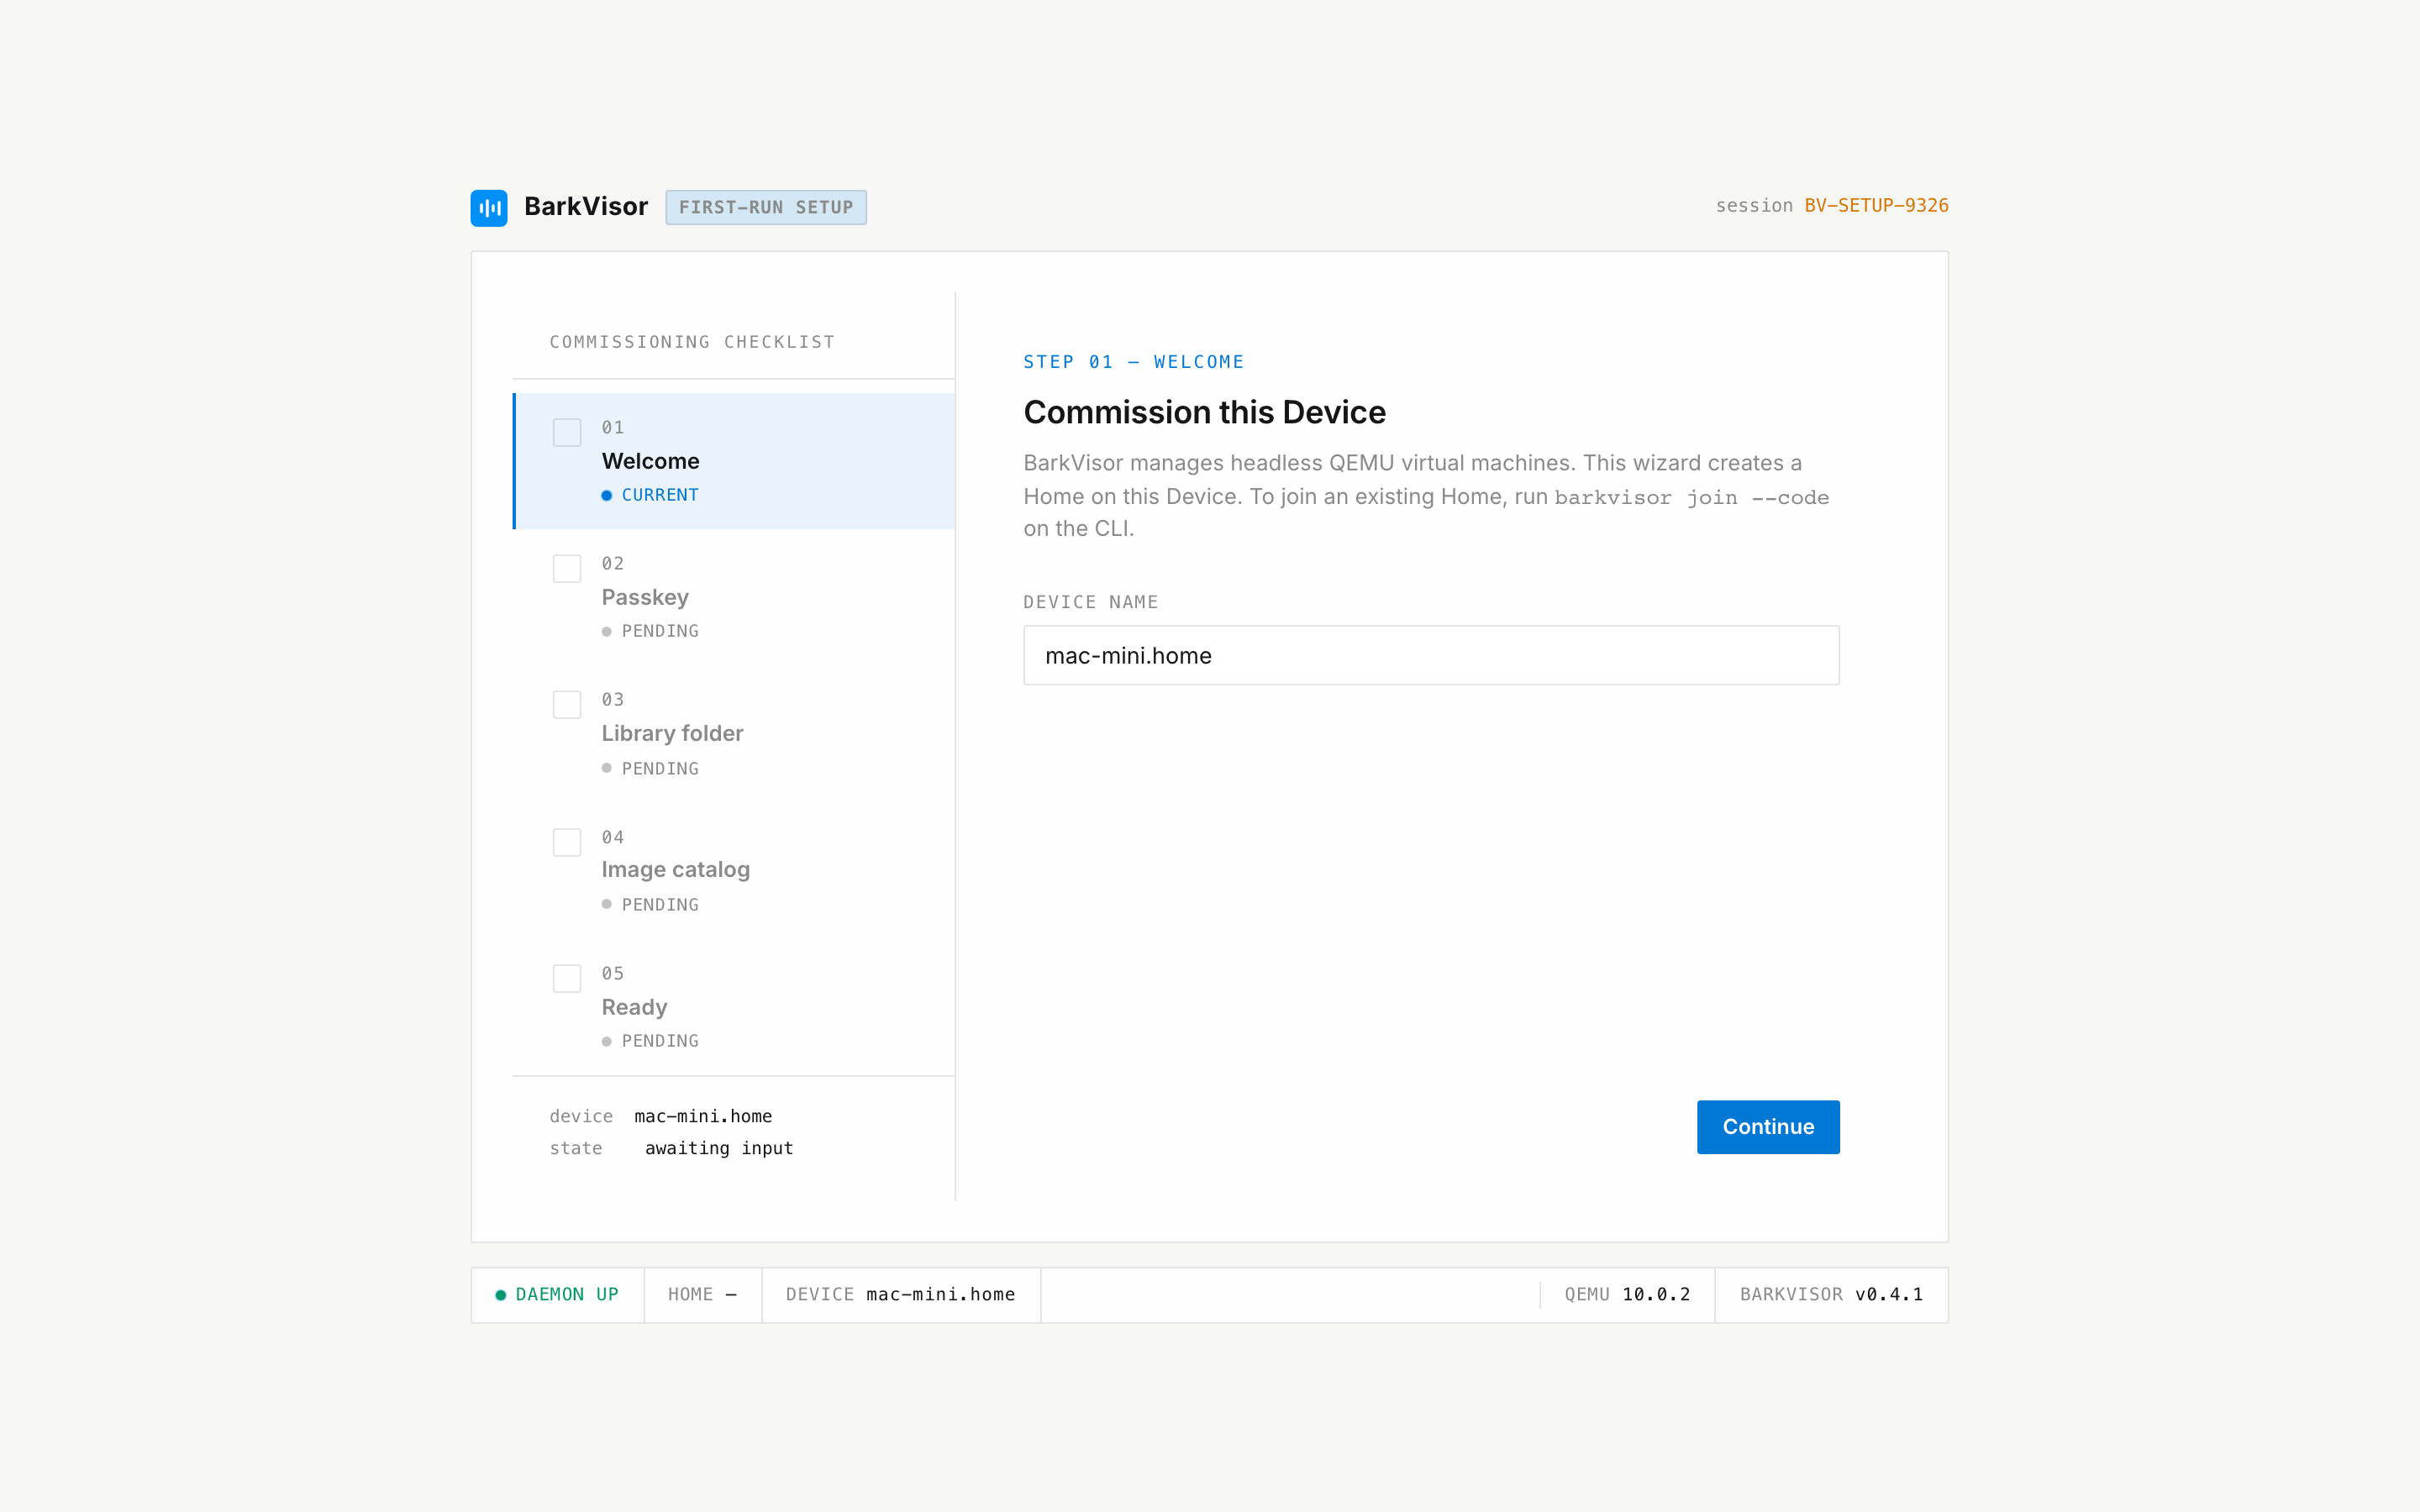
Confirm the Device name and click Continue. This creates the first Device in a new Home.
On a private computer, you can select skip sign-in on this computer. Setup still registers a passkey; afterward, direct local connections can enter without signing in. Network connections still require sign-in. You can change this under Settings → Security.
2. Add a passkey
Section titled “2. Add a passkey”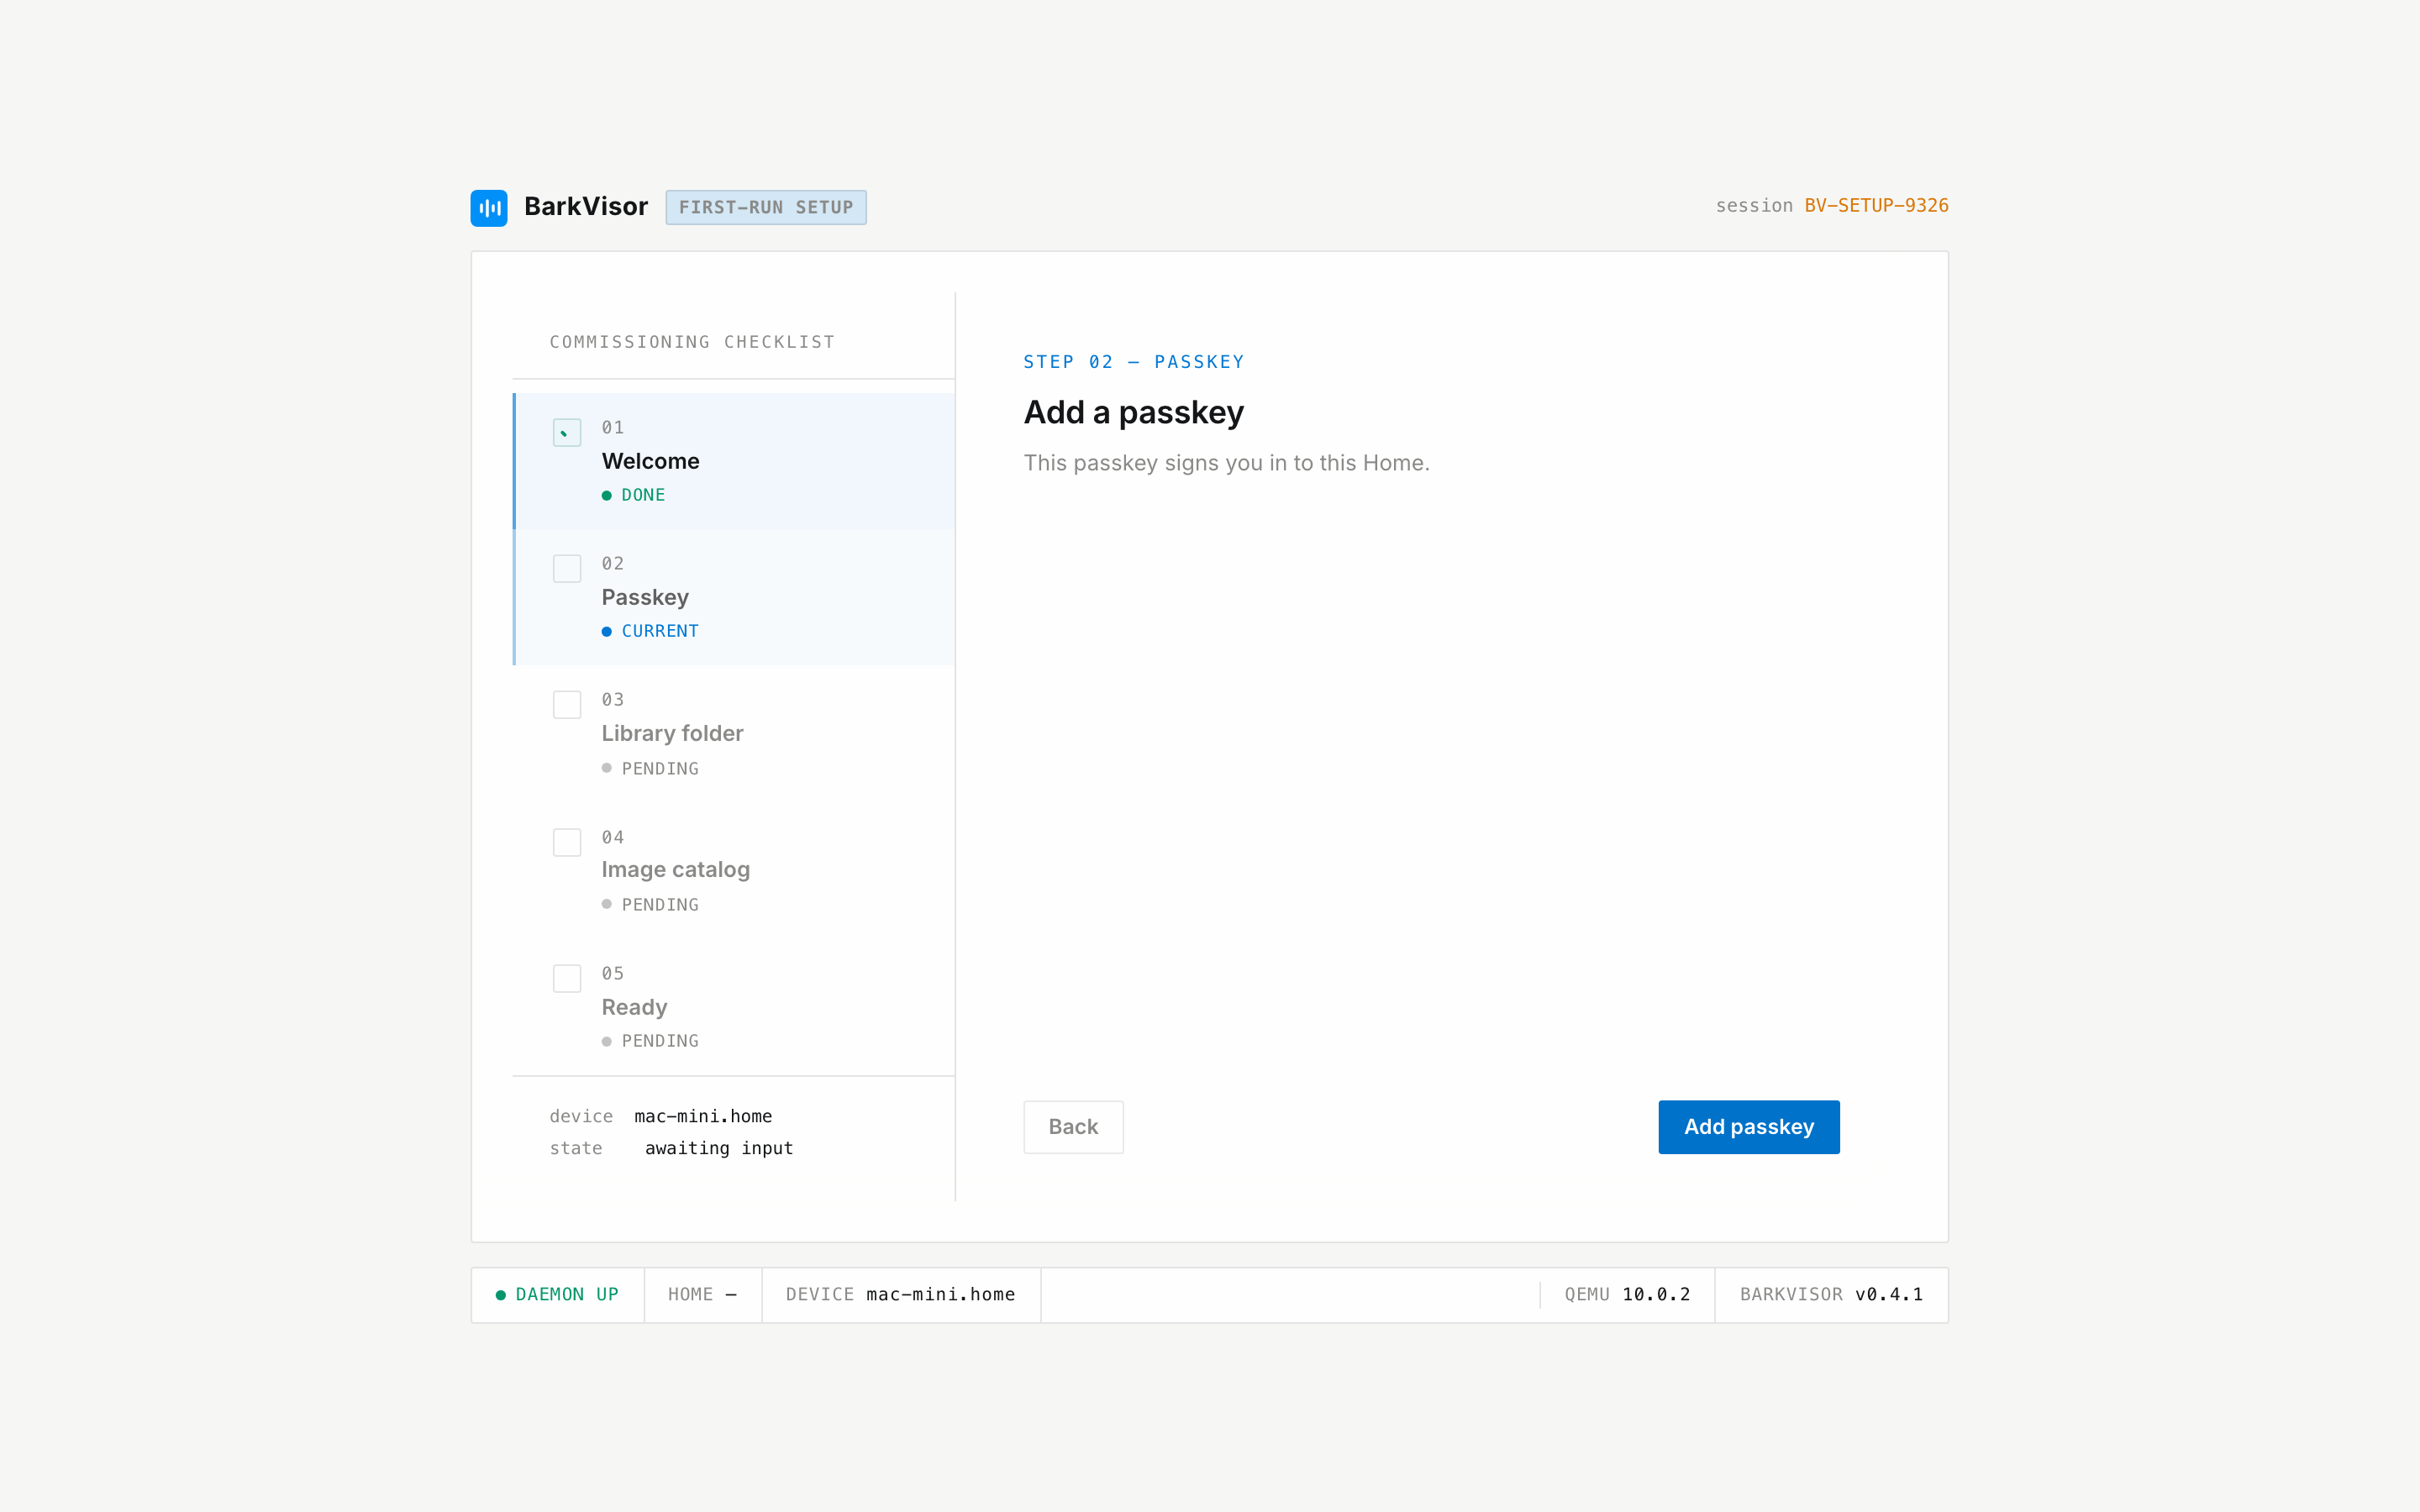
Click Add passkey and confirm with Touch ID, Windows Hello, or your password manager. The web console uses a passkey instead of a username and password.
If setup was interrupted after this step, reopen the same address. The wizard can resume at the Library step.
3. Choose the image Library folder
Section titled “3. Choose the image Library folder”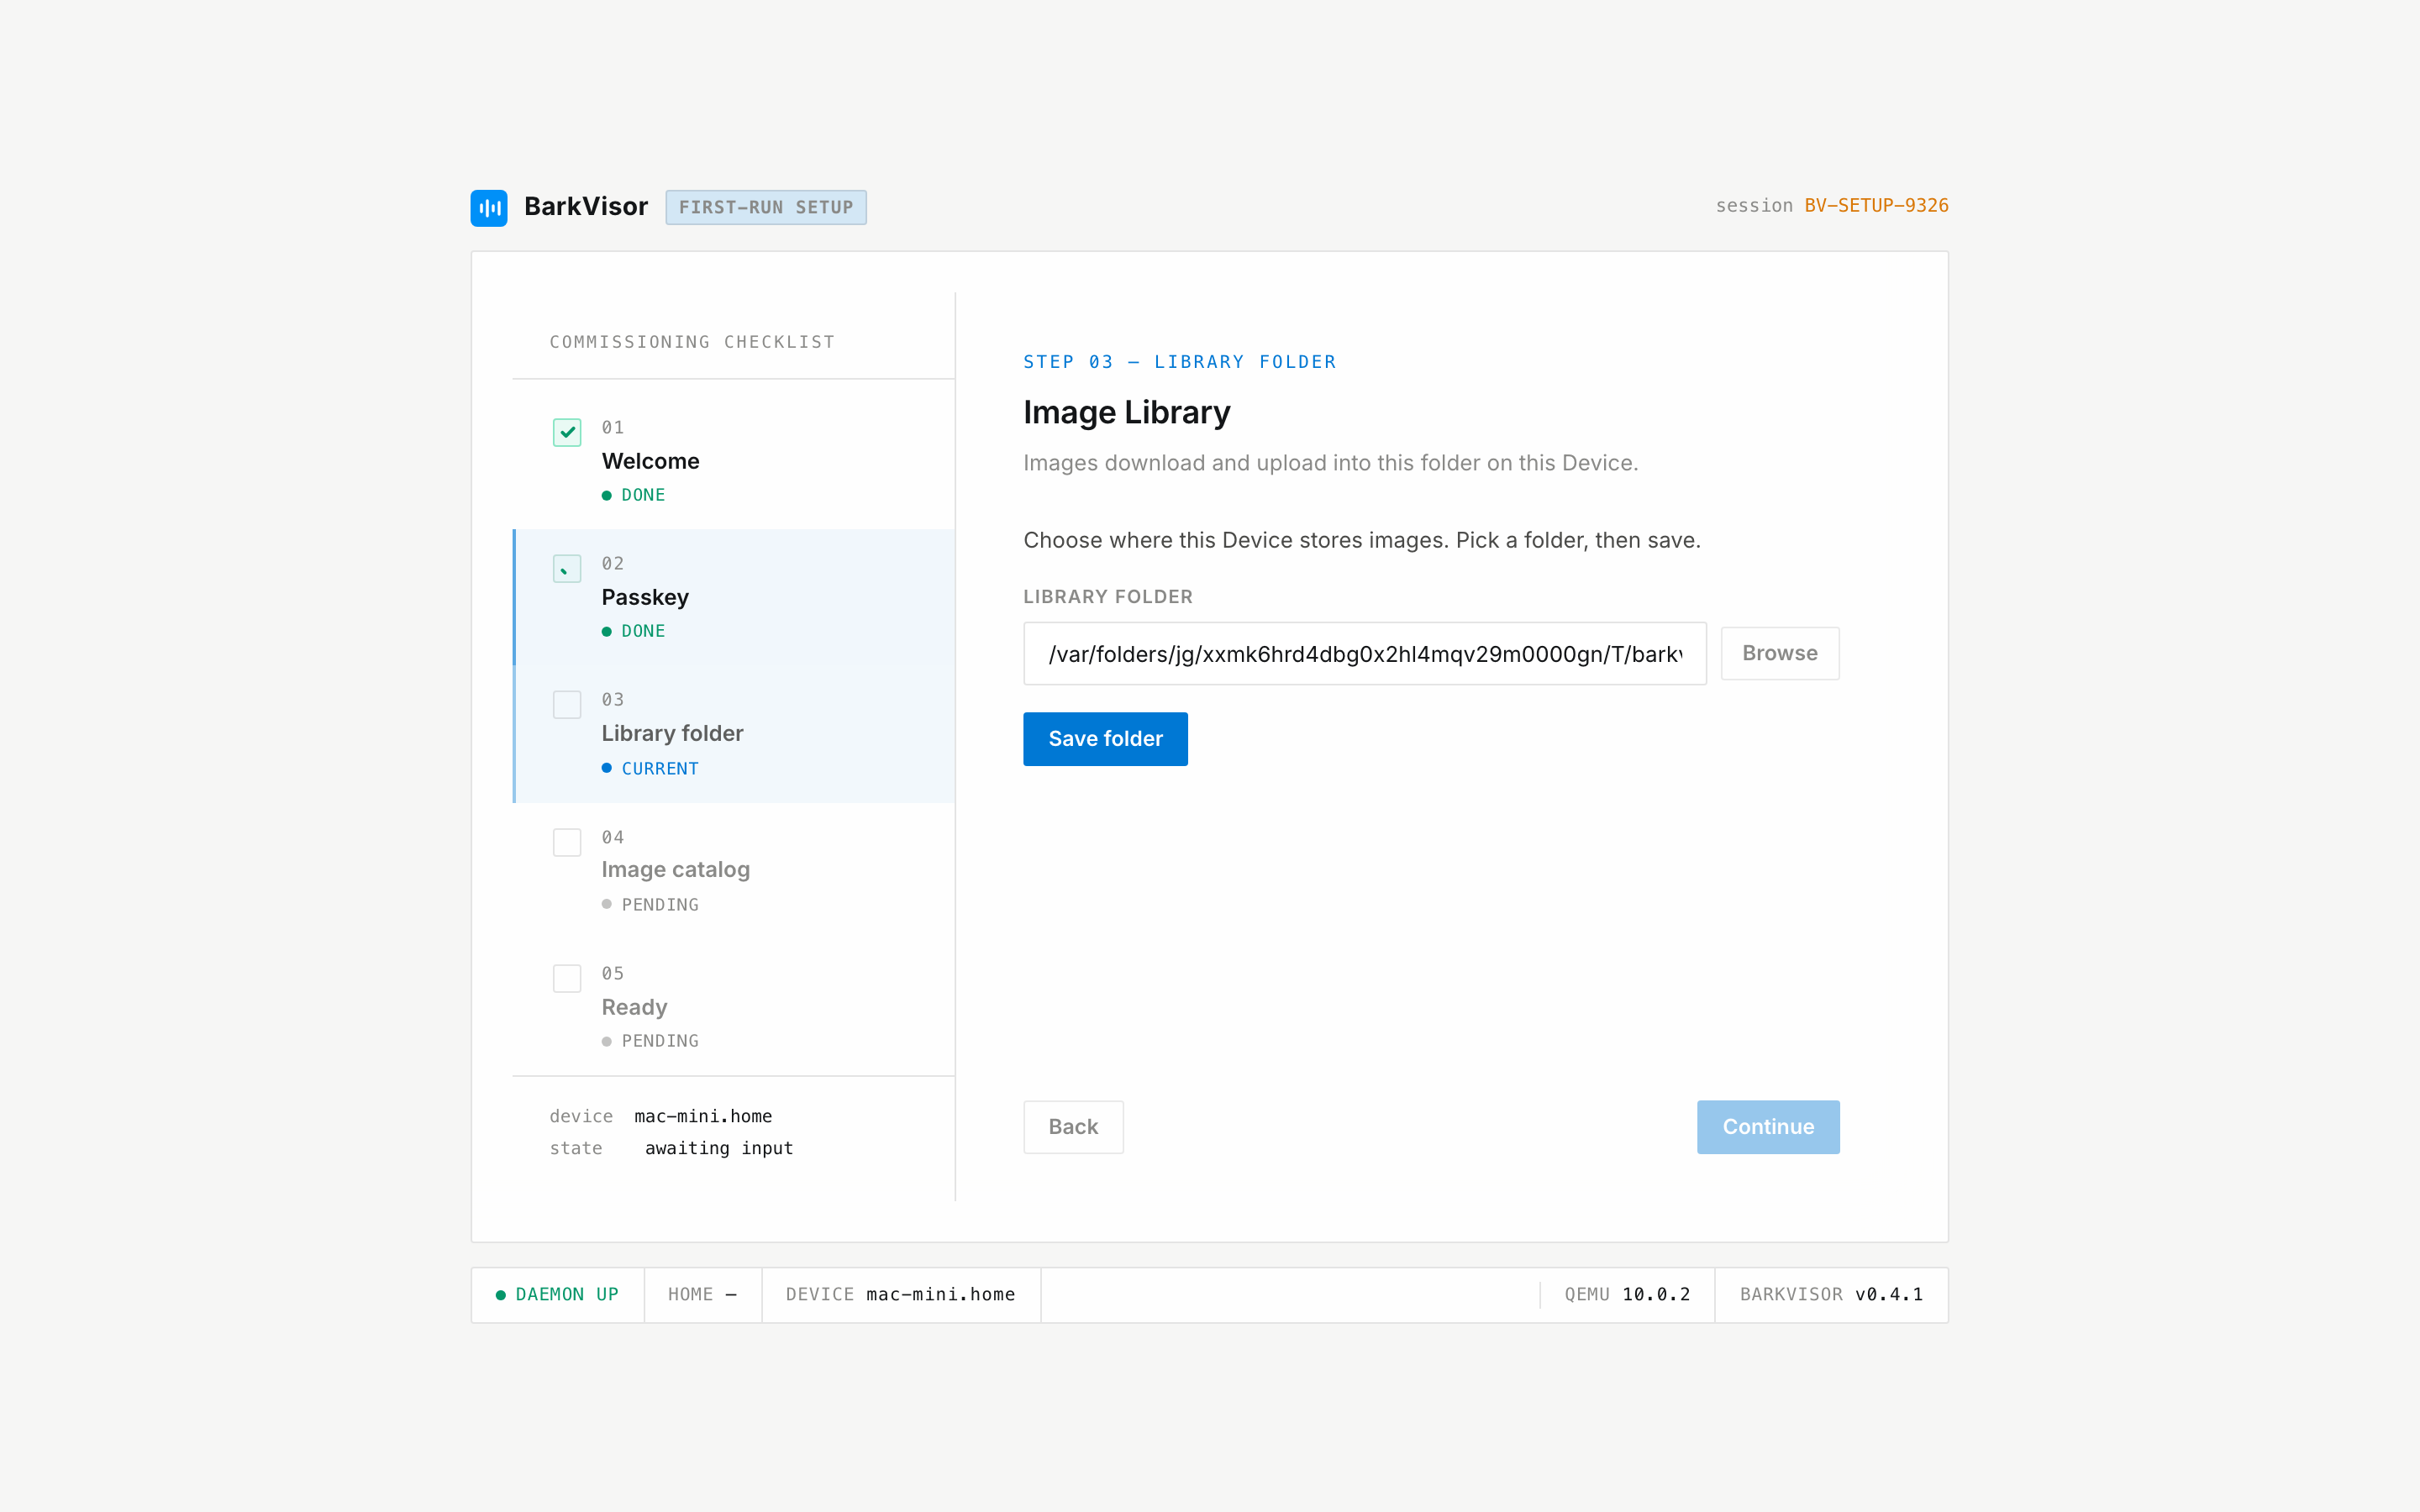
Keep the suggested folder or click Browse to choose another. Click Save folder, then Continue.
This folder stores downloaded and uploaded OS images. It is separate from your VM disks. You can change it later under Settings → Library.
4. Sync the catalog
Section titled “4. Sync the catalog”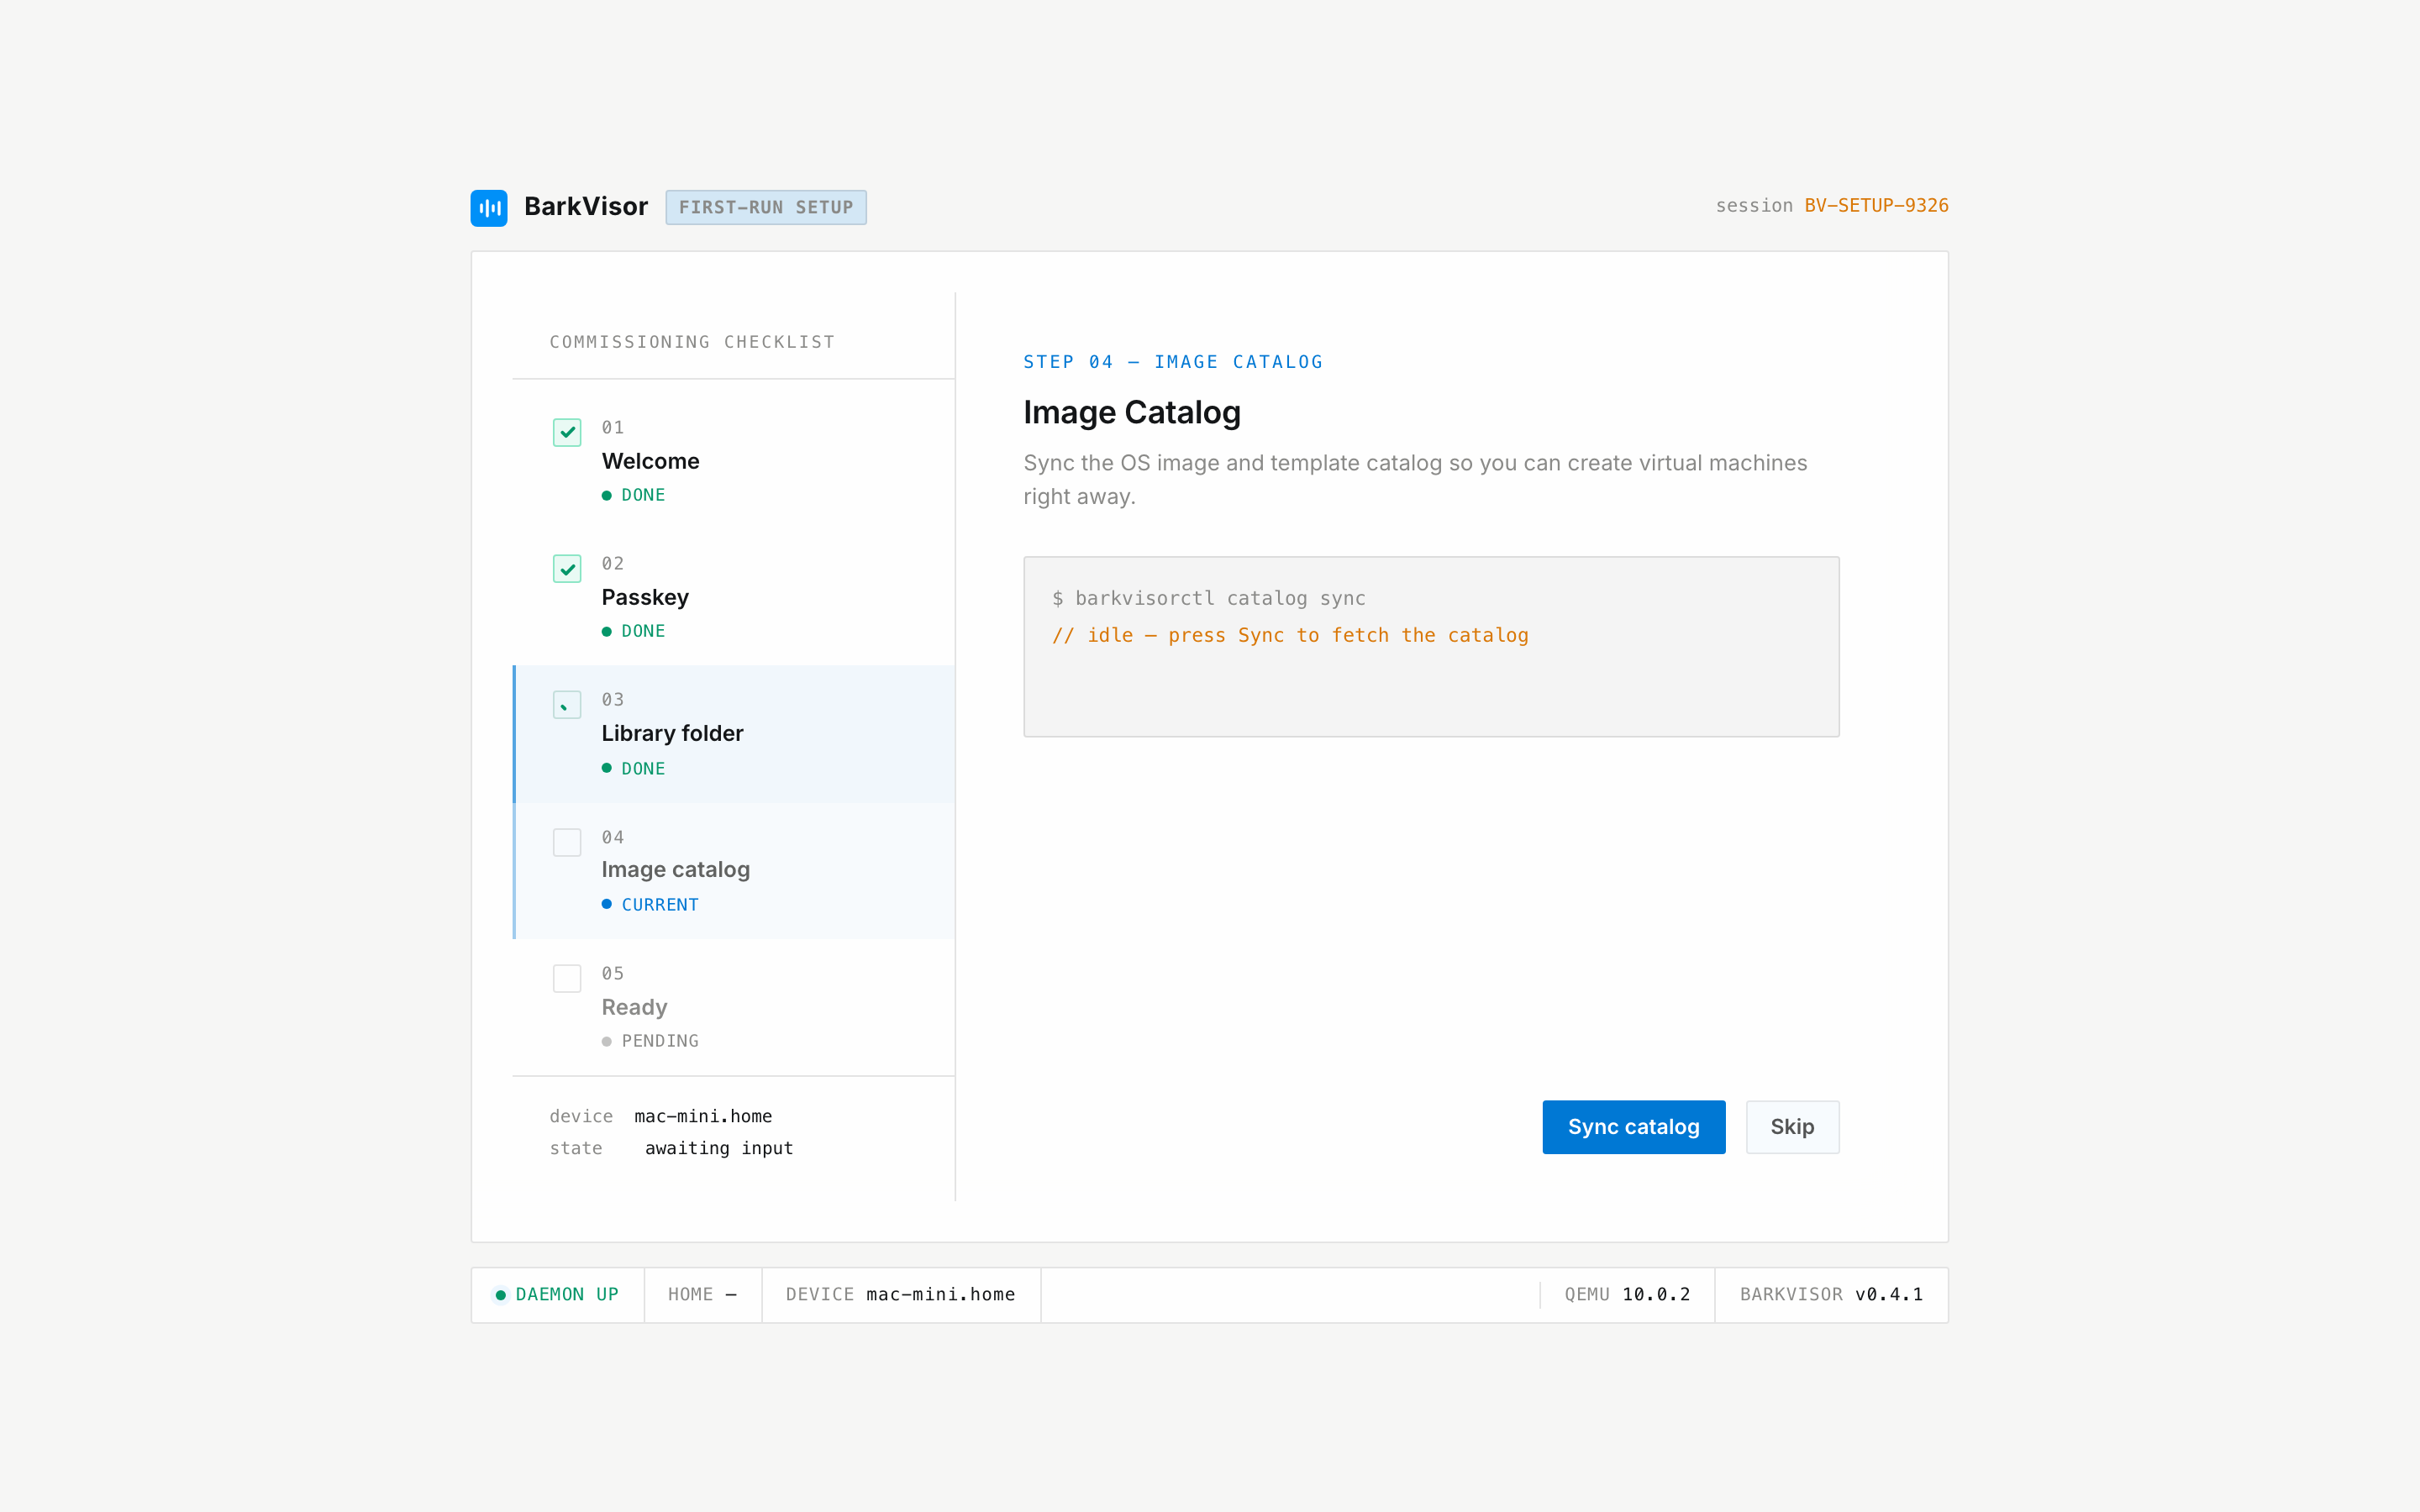
Click Sync catalog to load the list of available images and templates, then Continue. This fetches the catalog, not every OS image.
You can also click Skip and sync later from Settings → Repositories.
5. Open the Dashboard
Section titled “5. Open the Dashboard”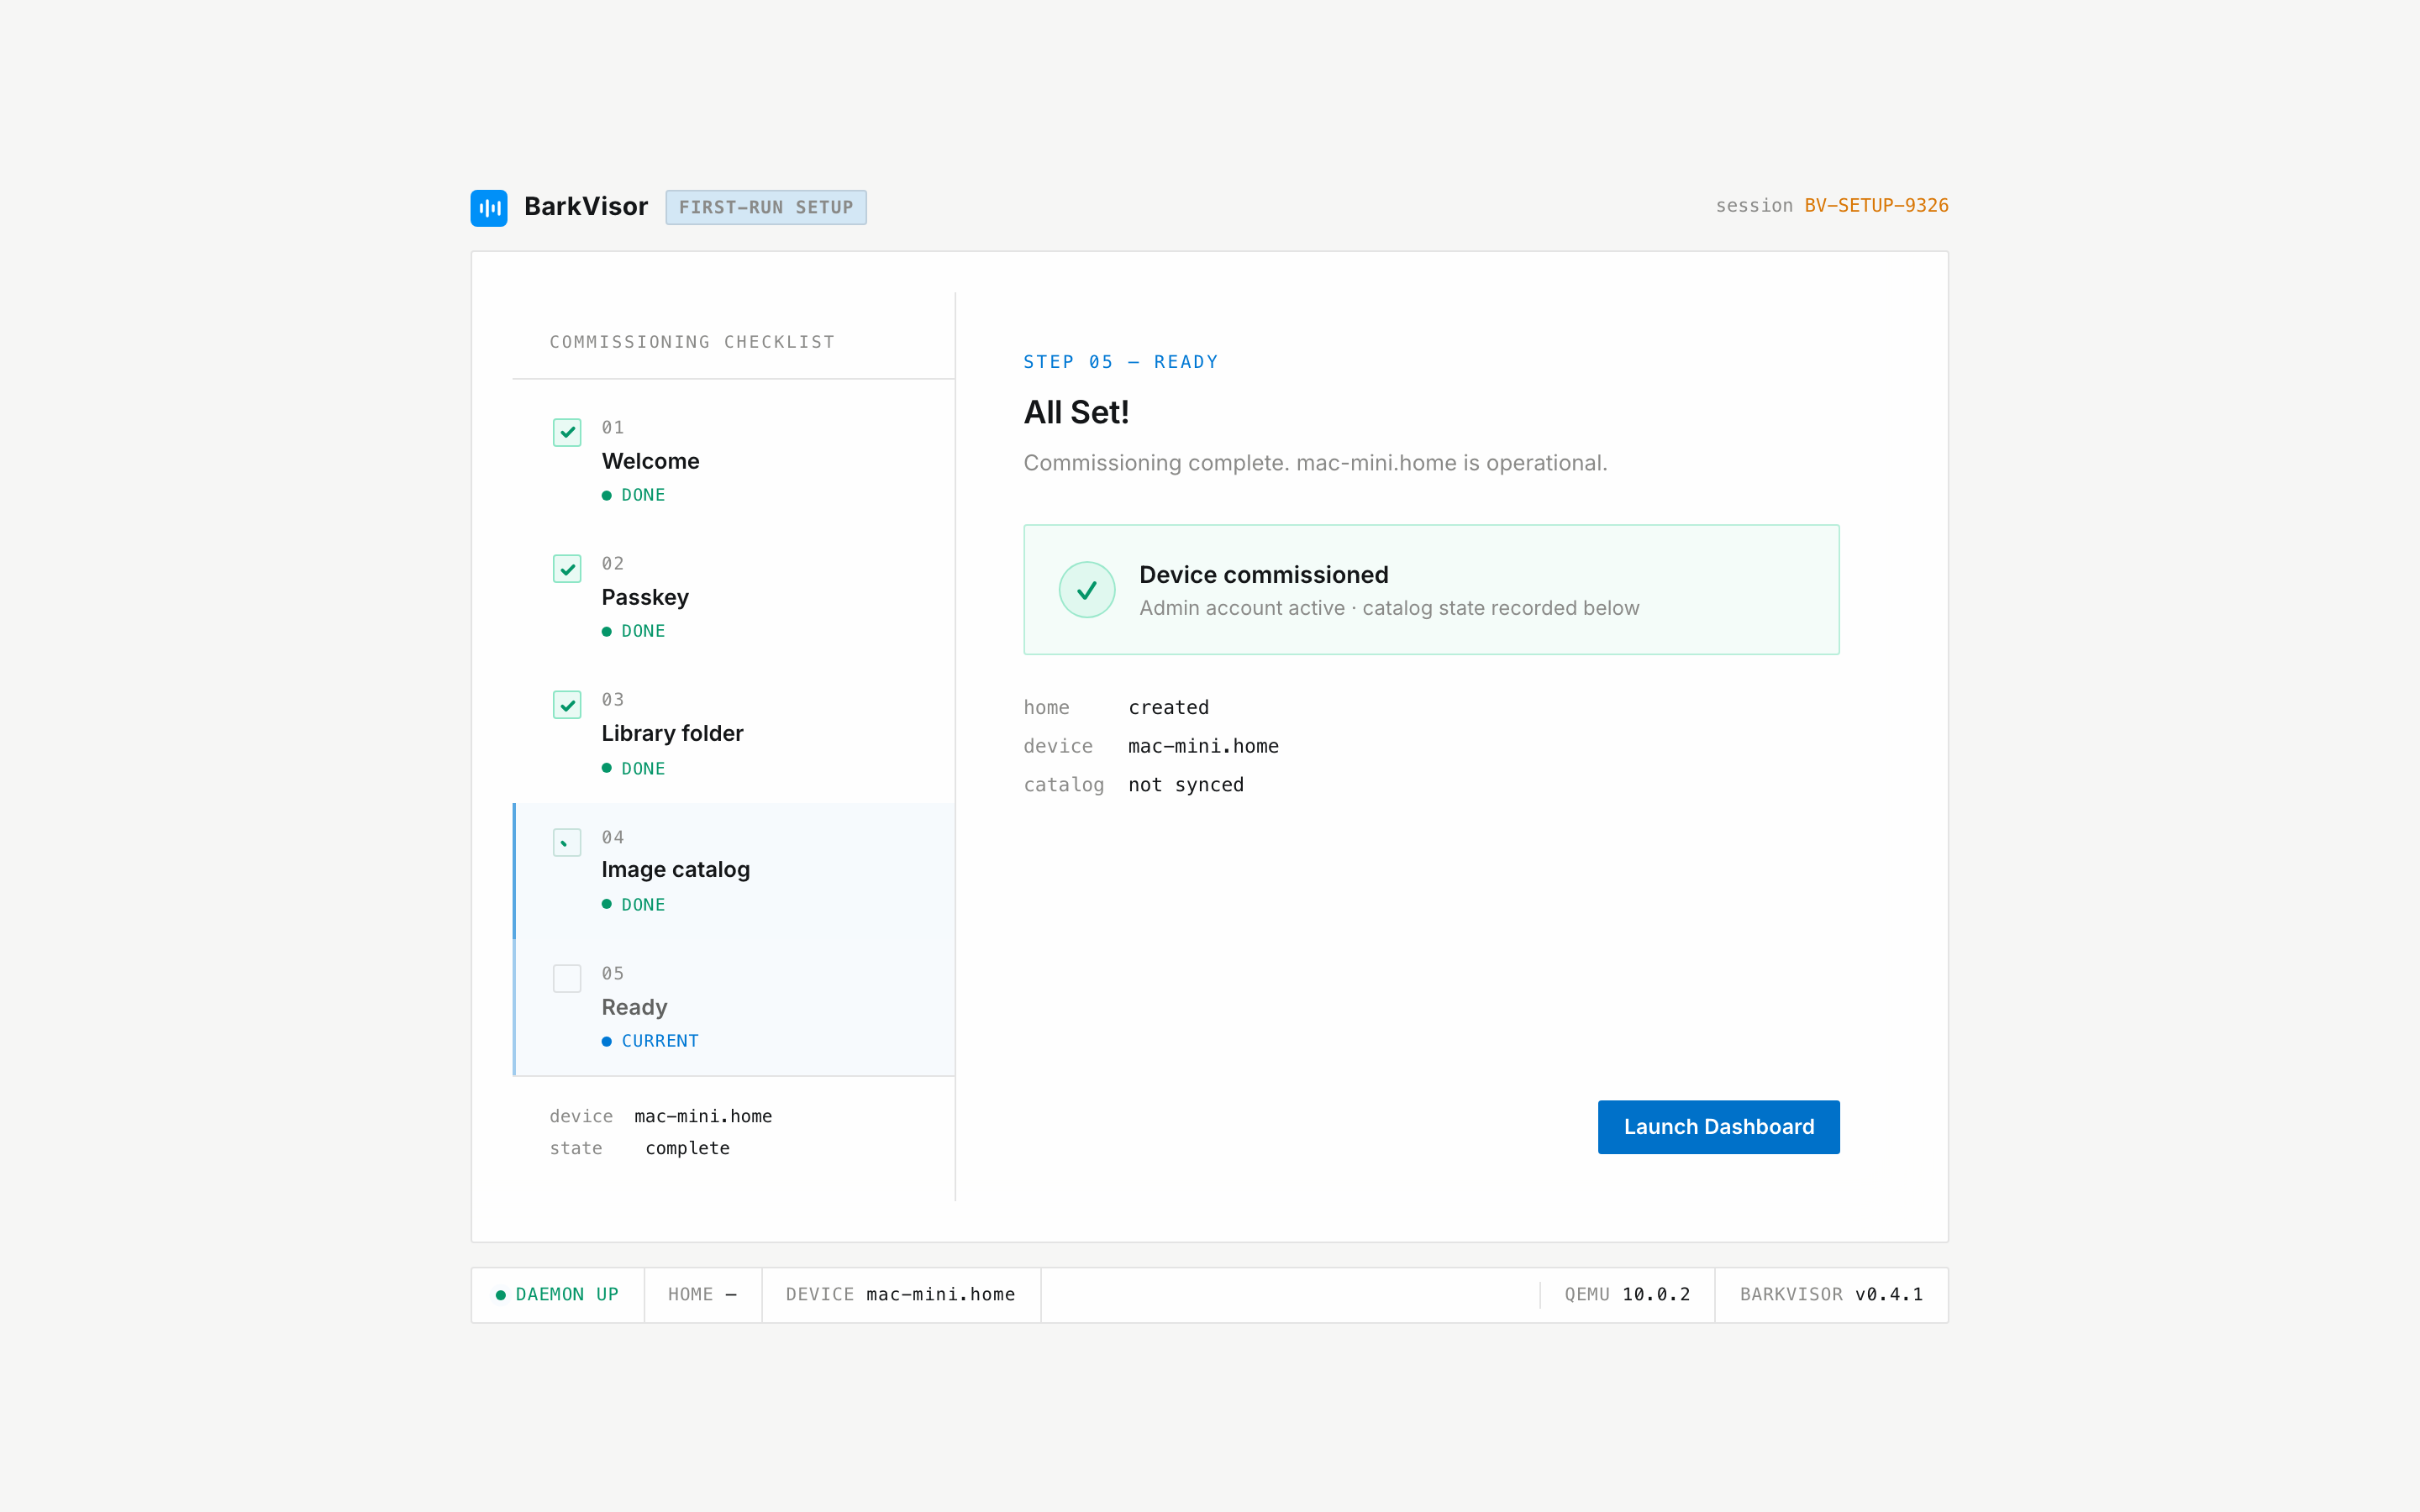
Click Launch Dashboard. BarkVisor signs you in and opens the Dashboard.
Next, create your first VM or install an App.
After setup
Section titled “After setup”Use the same web address each time you return. Sign in with your passkey unless your connection is allowed to skip sign-in. Add more passkeys under Settings → Passkeys.
NAT networking is ready without extra configuration. For bridged networking on macOS or Linux, follow Networks.
Stopping BarkVisor leaves running VMs alive. To shut down a VM, use its Stop action in the console.